
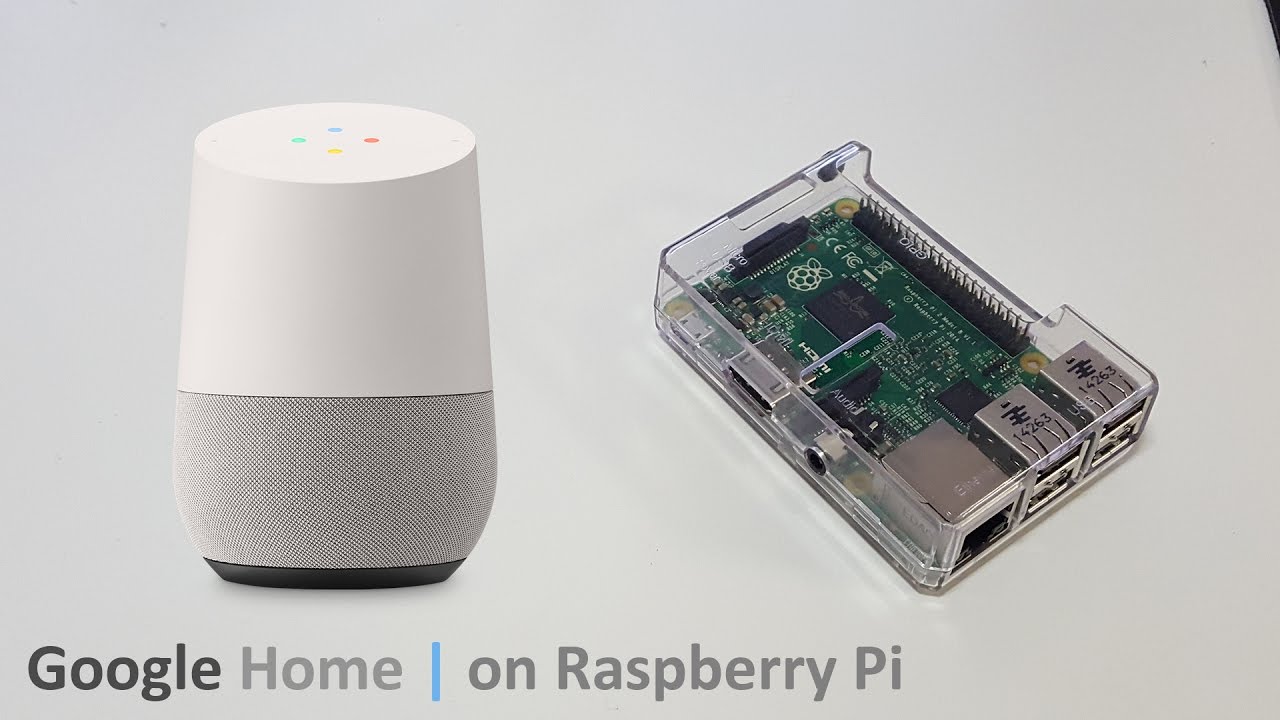
A Raspberry Pi Google Assistant is a DIY voice assistant that combines the power of the Raspberry Pi, a compact single-board computer, with the intelligence of Google’s voice recognition and natural language processing technologies. By building your own Raspberry Pi Google Assistant, you can create a personalized, hands-free digital assistant tailored to your specific needs and preferences.
Benefits of Building Your Own Raspberry Pi Google Assistant
Building your own Raspberry Pi Google Assistant offers several advantages over using pre-built smart speakers or virtual assistants:
- Customization: You have complete control over the hardware and software components, allowing you to customize the assistant’s functionality, appearance, and capabilities to suit your needs.
- Privacy: By hosting the assistant on your own hardware, you can ensure greater privacy and data security compared to cloud-based solutions.
- Cost-effective: The Raspberry Pi and required components are relatively inexpensive, making this project an affordable option for DIY enthusiasts and hobbyists.
- Learning Experience: Building your own Raspberry Pi Google Assistant is an excellent way to learn about embedded systems, programming, and voice interaction technologies.
Required Components
To build your own Raspberry Pi Google Assistant, you will need the following components:
- Raspberry Pi (Recommended: Raspberry Pi 3 Model B+ or newer)
- MicroSD card (minimum 8GB)
- Power supply
- USB microphone
- Speakers or headphones
- HDMI cable (for initial setup)
- Keyboard and mouse (for initial setup)
- Wi-Fi dongle (if not using an Ethernet connection)
Setting Up the Raspberry Pi
- Install the Operating System
- Download the latest version of Raspbian OS from the official Raspberry Pi website.
- Use the Raspberry Pi Imager tool to write the OS image to the microSD card.
- Configure the Raspberry Pi
- Connect the Raspberry Pi to a monitor, keyboard, and mouse.
- Follow the on-screen instructions to set up the Raspberry Pi, including connecting to Wi-Fi and updating the software packages.
- Install Required Software
- Open the Terminal and run the following commands to install the necessary software packages:
- sudo apt-get update
- sudo apt-get install python3-pip python3-venv python3-dev
- sudo apt-get install portaudio19-dev libffi-dev libssl-dev
- Open the Terminal and run the following commands to install the necessary software packages:
Setting Up Google Assistant
- Create a Google Cloud Project
- Go to the Google Cloud Console (https://console.cloud.google.com/) and create a new project.
- Enable the Google Assistant API for your project.
- Configure Google Assistant
- Follow the instructions in the Google Assistant documentation to configure your project and obtain the necessary credentials (OAuth client ID and client secret).
- Install the Google Assistant Library
- Create a new Python virtual environment and activate it.
- Install the google-assistant-library package using pip: pip install google-assistant-library
- Authenticate with Google Assistant
- Run the google-oauthlib-tool command and follow the prompts to authenticate with your Google account and obtain the necessary credentials.
Integrating Raspberry Pi and Google Assistant
- Connect the Hardware
- Connect the USB microphone and speakers to the Raspberry Pi.
- Write the Python Code
- Create a new Python file (e.g., assistant.py) and use the Google Assistant Library to implement the voice interaction functionality.
- Customize the code to handle specific voice commands, queries, and responses based on your requirements.
- Test and Refine
- Run the Python script and test the Raspberry Pi Google Assistant.
- Refine the code and configuration as needed to improve performance, add new features, or fix any issues.
Advanced Customization
To further enhance your Raspberry Pi Google Assistant, consider the following advanced customization options:
- Voice Training: Train the Google Assistant to better recognize your voice and speech patterns.
- Custom Skills: Develop custom skills or integrations with third-party services (e.g., smart home devices, productivity apps) using the Google Assistant SDK.
- Wake Word Detection: Implement wake word detection to activate the assistant without the need for a physical button press.
- Text-to-Speech (TTS): Customize the voice and language used for spoken responses.
Best Practices
- Security: Keep your Raspberry Pi and software up-to-date with the latest security patches and updates.
- Privacy: Be mindful of the data collected by the Google Assistant and take appropriate measures to protect your privacy.
- Accessibility: Consider implementing accessibility features, such as voice control or visual aids, to make your Raspberry Pi Google Assistant inclusive for users with diverse needs.
- Backup and Recovery: Regularly back up your Raspberry Pi’s configuration and data to ensure you can restore functionality in case of hardware failure or data loss.
Key Takeaways
- Building your own Raspberry Pi Google Assistant offers a high degree of customization, privacy, and cost-effectiveness.
- Setting up the Raspberry Pi and integrating it with the Google Assistant involves several steps, including hardware configuration, software installation, and coding.
- Advanced customization options, such as voice training, custom skills, and wake word detection, can further enhance the functionality and user experience of your Raspberry Pi Google Assistant.
- Implementing best practices for security, privacy, accessibility, and backup is crucial for a reliable and trustworthy DIY voice assistant.
Conclusion
Building your own Raspberry Pi Google Assistant is an exciting and rewarding project that combines the power of the Raspberry Pi with the intelligence of Google’s voice recognition technology. By following this comprehensive guide, you can create a personalized, hands-free digital assistant tailored to your specific needs and preferences. Whether you’re a hobbyist, a DIY enthusiast, or simply someone looking for a unique and engaging project, this project offers a perfect blend of challenge, learning, and innovation.
FAQs
- Can I use a different single-board computer instead of the Raspberry Pi?
Yes, you can use other single-board computers like the Beagle Board or NVIDIA Jetson Nano, but you may need to adjust the software installation and configuration steps accordingly. - Do I need to have prior programming experience?
While some basic programming knowledge is helpful, this project is designed to be accessible to beginners. The provided code and instructions should guide you through the process. - What is the range of the Google Assistant’s voice recognition?
The range of voice recognition depends on the quality of the microphone and the acoustic environment. Generally, a good-quality USB microphone should provide adequate coverage for a typical room. - Can I use the Raspberry Pi Google Assistant for commercial purposes?
The terms of service for the Google Assistant may restrict commercial use. Please review the terms and conditions carefully before using the assistant for any commercial purposes. - How do I update the Google Assistant’s capabilities or add new features?
Updates to the Google Assistant’s capabilities are typically handled by Google. However, you can develop custom skills or integrations using the Google Assistant SDK to add new functionality. - Is the Raspberry Pi Google Assistant always listening?
No, the assistant is not always listening by default. It only listens for voice commands or queries when the wake word or trigger is detected or when a physical button is pressed. - Can I use the Raspberry Pi Google Assistant offline?
While some basic functionality may work offline, most of the Google Assistant’s capabilities require an internet connection to communicate with Google’s servers for voice recognition, natural language processing, and data retrieval. - How much power does the Raspberry Pi Google Assistant consume?
The power consumption of the Raspberry Pi Google Assistant depends on the specific model of Raspberry Pi and the peripherals used. Generally, it consumes around 3-5 watts of power, making it energy-efficient. - Can I use multiple microphones or speakers with the Raspberry Pi Google Assistant?
Yes, you can connect multiple microphones and speakers to the Raspberry Pi using USB hubs or other audio interfaces. However, you may need to configure the audio settings accordingly. - How can I improve the voice recognition accuracy?
Voice recognition accuracy can be improved by following best practices, such as using a high-quality microphone, optimizing the acoustic environment, and training the Google Assistant with your voice patterns. - Can I use the Raspberry Pi Google Assistant in multiple languages?
Yes, the Google Assistant supports multiple languages. You can configure the language settings during the setup process or switch languages using voice commands. - How do I secure my Raspberry Pi Google Assistant?
To secure your Raspberry Pi Google Assistant, follow best practices such as keeping the software up-to-date, using strong passwords, enabling two-factor authentication, and limiting network exposure. - Can I integrate the Raspberry Pi Google Assistant with smart home devices?
Yes, you can integrate the Raspberry Pi Google Assistant with various smart home devices and platforms, such as Google Home, Amazon Alexa, or Home Assistant, using APIs and custom integrations. - How do I troubleshoot issues with the Raspberry Pi Google Assistant?
Troubleshooting issues may involve checking hardware connections, reviewing log files, testing individual components, and consulting online resources or forums for common problems and solutions. - Can I use the Raspberry Pi Google Assistant for home automation tasks?
Yes, you can use the Raspberry Pi Google Assistant for home automation tasks by integrating it with smart home devices or platforms and creating custom voice commands or routines. - How do I back up and restore my Raspberry Pi Google Assistant configuration?
You can back up your Raspberry Pi Google Assistant configuration by creating an image of the microSD card or copying relevant files and settings. To restore, simply write the backup image to a new microSD card or replace the configuration files. - Can I use the Raspberry Pi Google Assistant for educational or classroom purposes?
Yes, the Raspberry Pi Google Assistant can be an excellent educational tool for teaching programming, voice interaction technologies, and embedded systems. However, you should review the terms of service for any potential restrictions. - How do I update the Raspberry Pi Google Assistant to the latest version?
To update the Raspberry Pi Google Assistant to the latest version, you may need to update the Raspbian OS, Python packages, and the Google Assistant Library by following the official instructions and release notes. - Can I use the Raspberry Pi Google Assistant for accessibility purposes?
Yes, the Raspberry Pi Google Assistant can be a valuable accessibility tool for individuals with disabilities or special needs. You can customize the assistant’s functionality and integrate it with assistive technologies or devices. - How do I contribute to or collaborate on the Raspberry Pi Google Assistant project?
If you’re interested in contributing to or collaborating on the Raspberry Pi Google Assistant project, you can participate in online forums, join community groups, or contribute to open-source projects related to the Raspberry Pi or Google Assistant.