
The Raspberry Pi is a versatile single-board computer that has found its way into a wide range of projects, from home automation to industrial applications. However, one limitation of the Raspberry Pi is that it does not have a built-in Real-Time Clock (RTC). This means that when the device is powered off or experiences a power outage, it loses track of the current date and time.
An RTC is a computer clock that keeps track of the current time and date, even when the device is powered off or experiences a power interruption. Adding an RTC to your Raspberry Pi can be beneficial in various scenarios, such as:
- Time-sensitive applications: Projects that require accurate timekeeping, like data logging, scheduling tasks, or recording events, can benefit from an RTC.
- Network Time Protocol (NTP) server: With an RTC, your Raspberry Pi can act as an NTP server, providing accurate time to other devices on your network.
- Headless setups: If you run your Raspberry Pi in a headless configuration (without a monitor), an RTC ensures that the system time is correct when you connect remotely.
In this comprehensive guide, we’ll walk you through the process of adding an RTC to your Raspberry Pi, including hardware and software setup, configuration, and troubleshooting.
Hardware Requirements
To add an RTC to your Raspberry Pi, you’ll need the following hardware components:
- Raspberry Pi board: This guide is compatible with various Raspberry Pi models, including the Raspberry Pi 4, Raspberry Pi 3, and earlier versions.
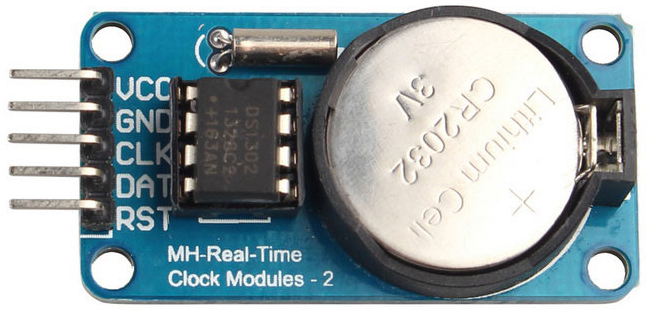
- RTC module: There are several RTC modules available in the market, such as the DS3231 or PCF8523. These modules typically communicate with the Raspberry Pi via the I2C protocol.
- Breadboard and jumper wires: You’ll need a breadboard and jumper wires to connect the RTC module to your Raspberry Pi’s GPIO pins.
Software Setup
Before we dive into the hardware setup, let’s ensure that your Raspberry Pi is properly configured for the RTC module.
Step 1: Update the Raspberry Pi Operating System
It’s always a good practice to keep your Raspberry Pi operating system up to date. Open a terminal window and run the following commands:
bash
sudo apt-get update
sudo apt-get upgrade
Step 2: Install the Required Packages
Next, you’ll need to install the necessary packages for the RTC module. The specific package names may vary depending on the RTC module you’re using. For the DS3231 RTC module, you can install the python-smbus and i2c-tools packages with the following command:
bash
sudo apt-get install python-smbus i2c-tools
Step 3: Enable I2C Interface
Since the RTC module communicates with the Raspberry Pi via the I2C protocol, you’ll need to enable the I2C interface. Open the Raspberry Pi configuration tool with the following command:
bash
sudo raspi-config
Navigate to the “Interface Options” menu, select “I2C,” and enable it. After making the change, you’ll be prompted to reboot your Raspberry Pi.
Hardware Setup
With the software configuration complete, it’s time to connect the RTC module to your Raspberry Pi.
Step 1: Identify the RTC Module Pinout
Consult the documentation or datasheet for your specific RTC module to identify the pinout. Typically, you’ll need to connect the following pins:
- VCC: This is the power pin, which should be connected to the 3.3V or 5V pin on the Raspberry Pi, depending on the module’s requirements.
- GND: This is the ground pin, which should be connected to one of the ground pins on the Raspberry Pi.
- SDA: This is the data line for the I2C communication, which should be connected to the SDA pin on the Raspberry Pi (usually GPIO 2).
- SCL: This is the clock line for the I2C communication, which should be connected to the SCL pin on the Raspberry Pi (usually GPIO 3).
Step 2: Connect the RTC Module
Using the breadboard and jumper wires, connect the RTC module to the appropriate pins on your Raspberry Pi. Make sure to double-check the connections to avoid any potential damage to the components.
Step 3: Verify the I2C Connection
After connecting the RTC module, you can verify the I2C connection by running the following command in the terminal:
bash
sudo i2cdetect -y 1
This command will scan the I2C bus and display the detected devices. You should see the address of your RTC module listed among the detected devices.
Software Configuration
With the hardware setup complete, it’s time to configure the software to work with the RTC module.
Step 1: Install the RTC Module Library
Depending on the RTC module you’re using, you may need to install a specific library or driver. For the DS3231 RTC module, you can install the python-dateutil and adafruit-circuitpython-ds3231 libraries with the following commands:
bash
sudo pip3 install python-dateutil
sudo pip3 install adafruit-circuitpython-ds3231
Step 2: Configure the System to Use the RTC
Next, you’ll need to configure your Raspberry Pi to use the RTC module for timekeeping. Open the /etc/fake-hwclock.data file in a text editor with root privileges:
bash
sudo nano /etc/fake-hwclock.data
In this file, replace the existing line with the following:
/dev/rtc0
Save the changes and exit the text editor.
Step 3: Restart the System
After making the necessary configuration changes, restart your Raspberry Pi to apply the new settings:
bash
sudo reboot
Upon reboot, your Raspberry Pi should now be using the RTC module for timekeeping.
Testing and Troubleshooting
To ensure that the RTC module is working correctly, you can perform the following tests and troubleshooting steps:
- Check the system time: After the reboot, check the system time by running the date command in the terminal. The displayed time should be accurate, reflecting the time set by the RTC module.
- Test power interruption: Unplug the power from your Raspberry Pi and wait for a few minutes. Then, reconnect the power and check the system time again. If the RTC module is working correctly, the time should be preserved and accurate.
- Troubleshoot I2C issues: If you’re experiencing issues with the I2C communication, try running the following command to check for any errors or conflicts:
bash
- sudo i2cdetect -y 1
If the RTC module address is not listed, double-check the hardware connections and ensure that the I2C interface is properly enabled. - Check the RTC module battery: Some RTC modules come with a backup battery to maintain the time even when the device is powered off. If the time is not being preserved after power interruptions, the battery may need to be replaced.
- Consult the RTC module documentation: If you’re still experiencing issues, consult the documentation or support resources provided by the RTC module manufacturer for additional troubleshooting steps or guidance.
Key Takeaways
- Adding a Real-Time Clock (RTC) to your Raspberry Pi ensures accurate timekeeping, even after power interruptions or reboots.
- The process involves both hardware and software setup, including enabling the I2C interface, connecting the RTC module, and configuring the system to use the RTC for timekeeping.
- Proper testing and troubleshooting steps can help identify and resolve any issues that may arise during the RTC integration process.
Conclusion
Adding a Real-Time Clock (RTC) to your Raspberry Pi is a straightforward process that can significantly enhance its capabilities and reliability in time-sensitive applications. By following the steps outlined in this guide, you can successfully integrate an RTC module with your Raspberry Pi, ensuring accurate timekeeping and enabling new possibilities for your projects.
Remember to carefully follow the hardware and software setup instructions, and don’t hesitate to consult the RTC module documentation or seek additional support if you encounter any issues. With an RTC in place, your Raspberry Pi will become a more robust and reliable platform for a wide range of applications.
FAQs
- What is the purpose of adding an RTC to a Raspberry Pi?
The main purpose of adding an RTC (Real-Time Clock) to a Raspberry Pi is to maintain accurate time and date information, even when the device is powered off or experiences a power interruption. - Can I use any RTC module with the Raspberry Pi?
While there are various RTC modules available, the most commonly used ones for the Raspberry Pi are the DS3231 and PCF8523. It’s important to ensure compatibility and follow the specific instructions for your chosen module. - Do I need to install any additional software to use the RTC?
Yes, you’ll need to install the appropriate library or driver for your RTC module. For example, the DS3231 RTC module requires the installation of the python-dateutil and adafruit-circuitpython-ds3231 libraries. - How do I enable the I2C interface on the Raspberry Pi?
To enable the I2C interface, open the Raspberry Pi configuration tool (sudo raspi-config), navigate to the “Interface Options” menu, select “I2C,” and enable it. After making the change, you’ll need to reboot your Raspberry Pi. - What should I do if the RTC module is not detected by the I2C bus?
If the RTC module is not detected by the I2C bus, double-check the hardware connections and ensure that the I2C interface is properly enabled. You can also run sudo i2cdetect -y 1 to scan for connected devices and troubleshoot any issues. - Can I use the RTC module with any Raspberry Pi model?
Yes, the RTC module can be used with various Raspberry Pi models, including the Raspberry Pi 4, Raspberry Pi 3, and earlier versions. The hardware and software setup process is generally the same across different models. - How do I configure the Raspberry Pi to use the RTC for timekeeping?
To configure the Raspberry Pi to use the RTC for timekeeping, you need to edit the /etc/fake-hwclock.data file and replace the existing line with /dev/rtc0. Save the changes and reboot your Raspberry Pi for the new settings to take effect. - What should I do if the time is not preserved after a power interruption?
If the time is not preserved after a power interruption, check if your RTC module has a backup battery and ensure that it is properly installed and functioning. If the issue persists, consult the RTC module documentation or seek additional support. - Can the Raspberry Pi act as an NTP server with the RTC module?
Yes, with an RTC module installed, your Raspberry Pi can act as an NTP (Network Time Protocol) server, providing accurate time to other devices on your network. - Is it possible to use multiple RTC modules with a single Raspberry Pi?
While it is technically possible to connect multiple RTC modules to a Raspberry Pi, it is generally not recommended or necessary. Most projects only require a single RTC module for accurate timekeeping. - How do I set the initial time on the RTC module?
The initial time on the RTC module can be set using the appropriate software library or tools provided by the module manufacturer. Consult the documentation for your specific RTC module to learn how to set the initial time. - Can the RTC module cause conflicts with other peripherals or devices?
In general, the RTC module should not cause conflicts with other peripherals or devices connected to the Raspberry Pi, as long as the hardware and software setup is done correctly. However, it’s always a good practice to follow best practices and consult the documentation for any potential compatibility issues. - How accurate is the timekeeping with the RTC module?
The accuracy of the RTC module can vary depending on the specific model and manufacturer. High-quality RTC modules, such as the DS3231, are known for their excellent accuracy, typically within a few seconds per month. - Can I use the RTC module for time-sensitive applications?
Yes, the RTC module is well-suited for time-sensitive applications, such as data logging, scheduling tasks, or recording events, as it provides accurate timekeeping even after power interruptions or reboots. - Is there a way to backup or restore the RTC module settings?
Some RTC modules may provide options to backup or restore their settings, but this functionality is typically module-specific. Consult the documentation or seek support from the manufacturer for information on backing up or restoring RTC module settings. - How do I update or upgrade the RTC module firmware?
The process for updating or upgrading the RTC module firmware (if available) depends on the specific module and manufacturer. Refer to the documentation or seek support from the manufacturer for guidance on firmware updates. - Can the RTC module be used with other operating systems besides Raspberry Pi OS?
While the instructions provided in this guide are specific to Raspberry Pi OS, it is possible to use the RTC module with other compatible operating systems. However, the setup process and required libraries or drivers may differ. - Is there a way to monitor the RTC module’s performance or health?
Some RTC modules may provide diagnostic tools or utilities to monitor their performance or health. Consult the documentation or seek support from the manufacturer for information on monitoring the RTC module’s performance or health. - Can the RTC module be used in industrial or harsh environments?
The suitability of using the RTC module in industrial or harsh environments depends on the specific module and its specifications. Some RTC modules are designed for industrial applications and can withstand extreme temperatures, vibrations, or other environmental conditions. - Are there any security considerations when using an RTC module?
While the RTC module itself does not pose significant security risks, it’s always a good practice to follow best security practices when integrating any external hardware or software components with your Raspberry Pi. Ensure that you are using trusted and reputable sources for the RTC module and associated libraries or drivers.