
ChangeDetection.io is a great self-hosted tool for monitoring websites for changes. It can be set up easily on a Raspberry Pi to run locally on your home network. This provides more security and privacy than relying on the hosted solution.
This article will walk through the entire process of setting up ChangeDetection.io on a Raspberry Pi from scratch. Detailed steps will cover:
- Hardware and OS requirements
- Downloading and installing the required software
- Configuring the application
- Automating the process to run on startup
- Optimizing performance
Follow along to have your own private website change monitoring system up and running in no time!
Hardware and Software Requirements
ChangeDetection.io works great on all versions of the Raspberry Pi. The OS installation and configuration steps in this tutorial use Raspberry Pi OS Lite.
It’s recommended to use a Raspberry Pi 4 if available for the best performance. But earlier versions will also work.
To set up the Pi, you’ll need:
- Raspberry Pi board
- 8GB+ SD card with Raspberry Pi OS Lite
- Power supply
- Network connection (Ethernet or WiFi)
Additionally, an external USB drive can be added for storing data to preserve the life of the SD card.
Installing Raspberry Pi OS and Software
Follow these steps to get your base OS Pi setup ready for ChangeDetection.io:
- Download and install the latest Raspberry Pi OS Lite image to an SD card. Reference the official documentation for guidance if needed.
- Boot the Pi board from the SD card and connect it to your network and a power supply.
- Log in, update packages with sudo apt update && sudo apt full-upgrade, and make sure the system is up-to-date. Reboot if needed.
- Change the default password with passwd.
- Enable the SSH server with sudo systemctl enable ssh && sudo systemctl start ssh.
- Use sudo raspi-config to expand the file system, enable SPI if an external drive is attached, set locale/timezone, etc. Exit and reboot if changed.
- Install Git with sudo apt install git.
At this point, your Raspberry Pi OS Lite OS setup is complete. Now we can move onto installing and configuring the software.
Installing and Setting Up ChangeDetection.io
With the underlying OS squared away on your Pi, we can proceed to download, install, and configure ChangeDetection.io:
- Download the ChangeDetection.io software:
cd ~
- git clone https://github.com/dgtlmoon/changedetection.io.git
- Run the setup script:
cd changedetection.io
- ./install
- Follow the prompts to configure email, storage locations, and other options.
- Once setup is complete, start the application:
- Copy code
- ./start
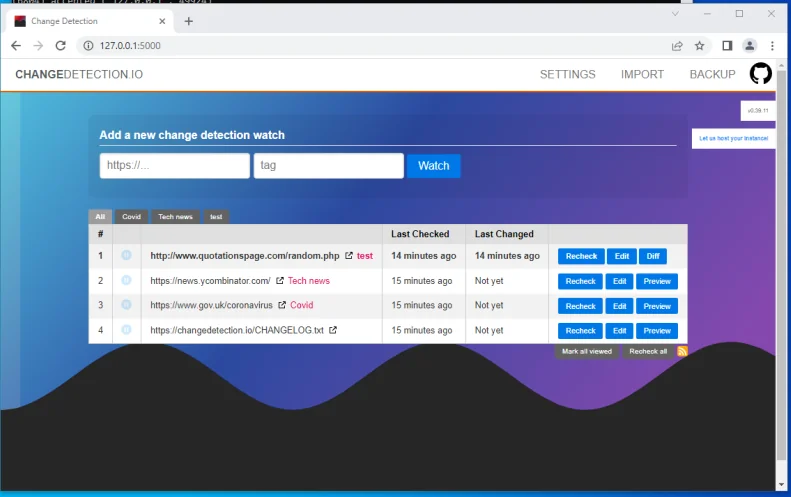
- Open a web browser and navigate to http://<raspberry_pi_IP>:8080 to access the ChangeDetection.io web UI and complete a first-run configuration wizard.
In just a few quick commands you now have the powerful website change tracker up and running on your Raspberry Pi!
Automating Startup
To ensure ChangeDetection.io starts monitoring changes automatically on bootup:
- Make a unit file:
- sudo nano /etc/systemd/system/changedetectionio.service
- Add the following, updating any file paths as needed:
[Unit]
Description=ChangeDetection.io
After=network.target
[Service]
WorkingDirectory=/home/pi/changedetection.io
ExecStart=/usr/bin/python run
Restart=on-failure
[Install]
- WantedBy=multi-user.target
- Register systemd changes:
- Copy code
sudo systemctl daemon-reload
- sudo systemctl enable changedetectionio
Now your Pi will boot up and launch monitoring without intervention!
Optimizing Performance
With ChangeDetection.io running smoothly 24/7, some tweaks can improve Pi performance:
- Set CPU governor to ondemand to save power when idle
- Add a heatsink or fan to regulate temperatures
- Use an external USB drive to reduce SD card wear
- Close unnecessary services with sudo systemctl disable
- Adjust ChangeDetection.io settings like check frequency to lower resource usage
Tweak based on your model Pi and reporting needs to balance performance vs wear and tear.
Key Takeaways
Running ChangeDetection.io on a Raspberry Pi provides local privacy and customization options over relying solely on the hosted version.
The major steps to set up website change monitoring are:
- Install and configure base OS
- Get ChangeDetection code and prerequisites
- Complete one-time configuration
- Automate launching on system boot
- Optimize resource usage for your Pi model
In an hour or two, you can build your own always-on monitoring service! The Pi works great for this use case.
Customize reporting depth, frequency, storage, and more to meet your specific needs. Lean on the Raspberry Pi community for advice or troubleshooting if you run into any issues while self-hosting ChangeDetection.io.
Frequently Asked Questions
- What model Raspberry Pi should I use?
The Pi 4 B with 8GB RAM is recommended. But ChangeDetection runs well on any Pi with at least 2GB RAM. Use an external drive if storage space is constrained. - Is the Raspberry Pi powerful enough?
Yes, modern Pi boards can easily handle ChangeDetection.io’s load along with common OS services. Monitor resource usage if running other demanding applications simultaneously. - How do I access the application?
After installing, access the web UI at http://<local_pi_ip_address>:8080. Port 8080 and credentials were set during initial setup wizard. - Can I encrypt document storage?
Yes! For privacy reasons, it’s wise enable disk encryption using Crypt setup utility in Raspberry Pi OS Lite during early setup. - What’s the average Pi CPU usage?
Depends on sites monitored and check frequency, but often less than 10%. Multi-core Pi handles this workload efficiency. - Does ChangeDetection.io auto update on the Pi
No, but you can add a cron job to periodically pull new code from the Github repository to stay update. - Can I run it on headless Pi?
Yes, after the initial setup wizard ChangeDetection.io runs happily in headless environement without a keyboard or display attached. - How do I backup my ChangeDetection data?
Sync the database and data volumes to external drives. Or utilize built-in export/import database mechanisms. Test restores periodically. - Why does my Pi run hot with ChangeDetection.io?
Add a heat sink, enable throttling governors, avoid overclocking, and tweak change check frequency to cool your Pi. Monitor thermals. - What’s the best way to be notified of events?
Take full advantage of webhook integrations for notifications across various channels like email, Slack, Pagerduty, etc. - Can I monitor sites that require login credentials?
Yes, the site monitor configuration allows entering usernames/passwords so authenticated sites can be monitored fully. - What maintenance is required for ChangeDetection?
Occasional reboots, software updates, pruning old data per your retention policies. Check logs for errors. Promote backups. - Should I store data externally from the SD card?
Highly recommended for improved storage speed, capacity, and SD card lifespan. Or send data over network to another server. - Can I monitor internal or local network sites?
Yes, utilize your Pi as the source rather than ChangeDetection.io servers for internal IPs that are not globally reachable. - How many sites can I monitor?
Depends most on check frequency configured rather than site count. Budget 50-100 checks per minute comfortably. Stress test from there. - What recovery options exist if my Pi fails?
Simply setup a new Pi using same configurations and import old database dump to resume monitoring with minimal data loss residing only in intervals since last backup. - Can I increase memory allocated to Docker?
Yes, customize docker daemon settings. But compiled binary version won’t require container overhead and resources better leverage Pi hardware. - Is SSH access enabled by default?
SSH server is intentionally enabled during initial setup instructions covered to ease remote headless access, security highly encouraged.